undefined

bokuweb.me

Angular2でReactのチュートリアルを試してみる

概要

一回触ってみたいと思っていたAngular2をようやく触ってみた。最近は新しいフレームワークやライブラリを触る場合はゲームを作ってみるか、Reactのチュートリアルをやるようにしていて、今回はReactのチュートリアル(コメントフォームのやつ)をAngular2でやってみることにした。

基本的には環境構築周りは以下のシェルスクリプトマガジンとAngularのSlackチームng-japanのビギナー用に紹介されていた手順を踏んでいる。

シェルスクリプトマガジン vol.37

シェルスクリプトマガジン vol.37

  • 作者: 當仲寛哲,岡田健,佐川夫美雄,大岩元,松浦智之,後藤大地,白羽玲子,水間丈博,濱口誠一,すずきひろのぶ,花川直己,しょっさん,法林浩之,熊野憲辰,桑原滝弥,USP研究所,ジーズバンク
  • 出版社/メーカー: USP研究所
  • 発売日: 2016/04/25
  • メディア: 雑誌
  • この商品を含むブログを見る

Join ng-japan on Slack!

なにか間違いやより良い方法などありましたらご指摘願います。

バージョン

package.jsonも最後にのせるが

Angular: 2.0.0-rc.3 Typescript: 1.8.10

で試している。

Repository

github.com

作業ログ

インストール

Angular2関連のパッケージは@angular/xxxxxという形式になっているよう。すこし前まではangular2/xxxxxだったのかな。 一点注意が必要なのはRx.jsのバージョンが上がって、symbol-observableが必要になった点でしょうか。その他はほぼ、slackで紹介されていた手順だと思う。

stackoverflow.com

$ npm init -y

$ npm i -S es6-shim systemjs symbol-observable zone.js reflect-metadata rxjs @angular/common @angular/compiler @angular/core @angular/platform-browser @angular/platform-browser-dynamic

$ npm i -D concurrently lite-server typescript typings

npm scriptの記述。

  • package.json
"scripts": {
  "start": "concurrently \"npm run tsc:w\" \"npm run lite\" ",
  "tsc": "tsc",
  "tsc:w": "tsc -w",
  "lite": "lite-server",
  "typings": "typings",
  "postinstall": "typings install"
},

typescriptの設定。

  • tsconfig.json
{
  "compilerOptions": {
    "target": "es5",
    "module": "system",
    "moduleResolution": "node",
    "sourceMap": true,
    "emitDecoratorMetadata": true,
    "experimentalDecorators": true,
    "removeComments": false,
    "noImplicitAny": false
  },
  "exclude": [
    "node_modules",
    "typings/main",
    "typings/main.d.ts"
  ]
}

型情報のインストール

$ node_modules/.bin/typings init
node_modules/.bin/typings install -GS es6-shim jasmine --source dt
touch index.html
mkdir scripts
touch scripts/main.ts
mkdir -p components/home
touch components/home/home.ts
touch system-config.ts
touch bs-config.json
  • bs-config.json
{
  "port": 8000,
  "files": ["./**/*.{html,htm,css,js}"],
  "server": { "baseDir": "./" }
}

system.jsの設定。この辺りよく作法を理解していないので要復習。

  • system-config.js
System.config({
  map: {
    '@angular': 'node_modules/@angular',
    'rxjs': 'node_modules/rxjs',
    'scripts/main': 'app/main.js',
    'symbol-observable': 'node_modules/symbol-observable',
  },
  packages: {
    '@angular/core':  { main: 'index' },
    '@angular/common':  { main: 'index' },
    '@angular/compiler':  { main: 'index' },
    '@angular/http':  { main: 'index' },
    '@angular/router':  { main: 'index' },
    '@angular/platform-browser':  { main: 'index' },
    '@angular/platform-browser-dynamic':  { main: 'index' },
    'symbol-observable': { defaultExtension: 'js', main: 'index' },
    'rxjs':  { main: 'Rx' },
    'components':  { main: 'index' }
  }
});
<!DOCTYPE html>
<html lang="en">
    <head>
        <meta charset="UTF-8">
        <base href="/">
        <title>ng2 comment system</title>
    </head>
    <body>
        <comment-box>Loading...</comment-box>
        <script src="node_modules/es6-shim/es6-shim.js"></script>
        <script src="node_modules/reflect-metadata/Reflect.js"></script>
        <script src="node_modules/systemjs/dist/system.src.js"></script>
        <script src="node_modules/zone.js/dist/zone.js"></script>
        <script>
         System.import('system-config.js')
               .then(function () {
                   System.import('app/main');
               })
               .catch(console.error.bind(console));
        </script>
    </body>
</html>
  • app/main.ts
import {bootstrap} from '@angular/platform-browser-dynamic'
import {AppComponent} from '../components/home/home'

bootstrap(AppComponent);
  • components/home.ts
import {Component} from '@angular/core'
@Component({
  selector: 'my-app',
  template: `
    <h1>Hello ng2</h1>
    `
})
export class AppComponent {
}

これでnpm startするとブラウザが開いて、Hello ng2 と表示されるはず。

Commentボックスの実装

app/main.tsから呼ぶのをcomponents/comment-boxに修正。

  • scripts/main.ts
import { bootstrap } from '@angular/platform-browser-dynamic';
import { CommentBox } from '../components/comment-box';

bootstrap(CommentBox);

index.htmlから呼ぶコンポーネント名を修正

<ng-app>を<comment-box>に変更

 <body>
   <comment-box>Loading...</comment-box>
          ...

components/home.tscomponents/comment-box.txに修正して、以下のように修正した。

comment-box

  • components/comment-box.ts
import { Component, OnInit } from '@angular/core';
import { CommentList } from './comment-list';
import { CommentForm } from './comment-form';
import { CommentService } from '../service/comment';
import Comment from '../interfaces/comment';

@Component({
  selector: 'comment-box',
  providers: [CommentService],
  directives: [CommentList, CommentForm],
  template: `
    <div class="commentBox">
      <h1>Comments</h1>
      <comment-list [comments]="comments"></comment-list>
      <comment-form (onCommentSubmit)="handleCommentSubmit($event)"></comment-form>
    </div>
  `,
})
export class CommentBox implements OnInit {

  comments: Comment[];

  constructor(private commentService: CommentService) {
  }

  ngOnInit() {
    this.commentService
      .startIntervalFetch()
      .subscribe(comments => this.comments = comments);
  }

  handleCommentSubmit(comment) {
    comment.id = this.comments.length;
    this.commentService
      .add(comment)
      .subscribe(res => this.comments.push(res));
  }
}

こうなるまで結構右往左往したんだけど、ひとまず結果だけを載せておく。 また、ポイントとなりそうな箇所を以下に記載しておく。

コンポーネント

Angular2ではコンポーネントはDecoratorを使用して以下のような形で記述するらしい。

@Component({
  selector: 'comment-box',
  providers: [CommentService],
  directives: [CommentList, CommentForm],
  template: `
    <div class="commentBox">
      <h1>Comments</h1>
      <comment-list [comments]="comments"></comment-list>
      <comment-form (onCommentSubmit)="handleCommentSubmit($event)"></comment-form>
    </div>
  `,
})
export class CommentBox implements OnInit {
 ...省略
selector

他のコンポーネントからこのコンポーネントを呼ぶ場合はこの名前を使って呼ぶ。上記の場合であれば<comment-box></comment-box>とする。(<comment-box />とは書けないよう。)また、カスタムディレクティブの場合は使用するディレクティブを次のdirectivesで指定する必要があるっぽい。

directives

使用するカスタムディレクティブをここで指定する。この場合はCommentList, CommentFormというディレクティブを使用する。

providers

Injectするサービスを指定する。Viewに関心のない処理などはサービスとして切り出してInjectするらしい。このコメントシステムであればサーバとAjax通信する処理をサービス(CommentService)として切り出して、Injectしている。Injectされる側(CommentService)は後述する。

templete

テンプレートストリングを使用して、以下のように書く。

  template: `
    <div>Hello</div>
  `

また、templateUrlを使って次のように別ファイルのhtmlを使用するこもできるっぽい。

templateUrl: 'foo/bar.html'

どっちが主流なのだろうか。デザイナーとの協業であれば後者のほうがやりやすいだろうし、チームの体制に左右されるだろうか。テンプレートストリングだとエディタのシンタックスハイライトとかインデントが死んでてみんなどうしているのって感じ。

class

デコレートされる側のclassは以下のようになっている。

export class CommentBox implements OnInit {

  comments: Comment[];

  constructor(private commentService: CommentService) {
  }

  ngOnInit() {
    this.commentService
      .startIntervalFetch()
      .subscribe(comments => this.comments = comments);
  }

  handleCommentSubmit(comment) {
    comment.id = this.comments.length;
    this.commentService
      .add(comment)
      .subscribe(res => this.comments.push(res));
  }
}

OnInitってのを継承していて、これはLifecycle Hooksを使うためのもの。今回はReactcomponentWillMount相当する(?あってる?)タイミングでサーバへリクエストを投げたかったので、OnInitを使用している。以下によくまとまっていた。

blog.yuhiisk.com

constructorでは後述するcommentService(主にサーバとのAjax通信するサービス)を受け取って、ngOnInitでポーリングする処理を呼んでいる。handleCommentSubmitでは子コンポーネントのcomment-formからのデータを受け取りcommentServiceに渡すことで、コメントを投稿している。startIntervalFetch()add()ともにobservableが返ってくるのでsubscribeしてcommentsを書き換えたり、追加したりしている。

comment-list

基本的にはcomment-boxでの知識があればほぼほぼ書けた。

  • components/comment-list.ts
import { Component, Input } from '@angular/core';
import { CommentItem } from './comment-item';

@Component({
  selector: 'comment-list',
  directives: [CommentItem],
  template: `
    <div class="comment-list">
      <div *ngFor="let comment of comments">
        <comment-item [author]="comment.author" [text]="comment.text"></comment-item>
      </div>
    </div>
    `
})

export class CommentList {
  @Input() comments;
}

新しいポイントは以下。

@Input()

親コンポーネントからディレクティブに対する入力は@input()で定義する必要がある。

*ngFor

みたまんま繰り返しを行う記述でstructural directivesと呼ぶらしい。他には、*ngIf="condition"等が用意されている。ちょっと前まではletではなく#と書いていたようで、#を使うと現在では動作はするが、#" inside of expressions is deprecated. Use "let" instead!という警告がでる。

ここではcommentsの要素数分繰り返し<comment-item></comment-item>に渡している。

詳細は以下を見ると良さそう。

angular.io

comment-form

フォーム部分については以下のようになった。

  • components/comment-form.ts
import { Component, Output, EventEmitter } from '@angular/core';
import { CommentList } from './comment-list';
import { CommentService } from '../service/comment';
import Comment from '../interfaces/comment';

@Component({
  selector: 'comment-form',
  template: `
    <div class="comment-form">
      <input type="text" value={{author}} (keyup)="onAuthorChange($event)" placeholder="Your name" />
      <input type="text" value={{text}} (keyup)="onTextChange($event)" placeholder="Say something..." />
      <input type="submit" value="Post" (click)="handleSubmit()" />
    </div>
    `,
  styles: [`
    .comment-form {
      margin-top: 50px;
    }
  `]
})
export class CommentForm {
  @Output() onCommentSubmit: EventEmitter<any> = new EventEmitter();

  public author: string
  public text: string

  onAuthorChange(e: KeyboardEvent): void {
    this.author = (<HTMLInputElement>event.target).value;
  }

  onTextChange(e: KeyboardEvent): void {
    this.text = (<HTMLInputElement>event.target).value;
  }

  handleSubmit(): void {
    const author = this.author.trim();
    const text = this.text.trim();
    if (!text || !author) return;
    this.onCommentSubmit.emit({ author, text });
    this.text = '';
    this.author = '';
  }
}

新しい要素は以下。

styles

コンポーネントのスタイルはstyleで指定できる。

  styles: [`
    .comment-form {
      margin-top: 50px;
      }
  `]

Angular2Scoped CSSを実現しているという話しをちらっと聞いていたんだけどどのように実現しているか見たら以下のようになっていた。

スコープはどのように実現しているか確認すると以下のようになっていた。attributeを使用して擬似的にスコープを実現しているように見える。

  • html
<comment-form _nghost-dkv-3="">
    <div _ngcontent-dkv-3="" class="comment-form">
      <input _ngcontent-dkv-3="" placeholder="Your name" type="text" ng-reflect-value="">
      <input _ngcontent-dkv-3="" placeholder="Say something..." type="text" ng-reflect-value="">
      <input _ngcontent-dkv-3="" type="submit" value="Post">
    </div>
</comment-form>
  • css
.comment-form[_ngcontent-dkv-3] {
    margin-top: 50px;
}

またstyleUrlsによりcssファイルを使用することもできるっぽい。

styleUrls: ['app/style.css'],

バインディング

<input type="text" value={{author}} (keyup)="onAuthorChange($event)" placeholder="Your name" />のようにしてkeyupイベントで値をセットし、反映している。この辺りは以下のように書くことで1way2wayか選択できるっぽい。

  • 2way binding
<input type="text" [(ngModel)]=”author” placeholder=”Your name” />
  • 1way binding
<input type="text" value={{author}} placeholder="Your name" />

また、changeだとハンドラが呼ばれるのはblurのタイミングっぽくて、ReactでいうonChangeのタイミングで呼びたかったらkeyupイベントを使うのが良さそうに見える。

angular.io

@output

@input()があったように出力は@output()を使用するっぽい。ここではフォームの内容をEventEmitterを使って<comment-box></comment-box>まで引き上げている。多分、<comment-form></comment-form>に直接CommentServiceInjectすることもできるんだろうけど、Dumb ComponentSmat Componentを意識するとこういうことになるんじゃないかと思う。

comment-item

特筆すべき箇所はないが、この時点でmarkedを追加した。 あと、タグを使用する場合は[innerHTML]を使用するっぽい。

  • components/comment-item.ts
import { Component, Input } from '@angular/core';
import { parse } from 'marked';

@Component({
  selector: 'comment-item',
  template: `
    <div class="comment">
      <h2 class="comment-author">
        {{author}}
      </h2>
      <span [innerHTML]="rawMarkup()"></span>
    </div>
  `
})

export class CommentItem {
  @Input() author: string
  @Input() text: string

  rawMarkup():string {
    return parse(this.text, { sanitize: true });
  }

markedの追加

以下の手順で行った。

npm i -S marked
node_modules/.bin/typings -GS install marked --source dt

system-config.jsに追加

System.config({
  map: {
    ...省略
    'marked': 'node_modules/marked',
  },
  packages: {
    ...省略
    'marked': { main: 'index' },
  }

comment-service

CommentServiceに使用するHttpモジュールについては以下を参考にした。

qiita.com

angular.io

  • service/comment.ts
import { Injectable } from '@angular/core';
import Comment from '../interfaces/comment';
import { Http, Request, Response } from '@angular/http';
import { Observable } from 'rxjs';
import 'rxjs/add/operator/map';

@Injectable()
export class CommentService {

  constructor(private http: Http) {
  }

  startIntervalFetch(): Observable<Comment[]> {
    return Observable.interval(1000)
      .flatMap(() => this.http.get("http://localhost:3001/comments"))
      .map(res => res.json() as Comment[]);
  }

  add(comment: Comment): Observable<Comment> {
    return this.http
      .post("http://localhost:3001/comments", comment)
      .map(res => res.json() as Comment);
  }
}

startIntervalFetch()では1秒ごとにサーバにコメントを取りに行って、add()でコメントを追加している。 この時点でjson-serverをインストールしてやり取りはそっちと行っている。

@Injectable()

@Injectable()DIを可能にする。

使う側(components/comment-box.ts)は以下のようになる。

@Component({
  providers: [CommentService],
})
export class CommentForm {
  constructor(private commentService: CommentService) {
  }

package.json

package.jsonは最終的に以下。

{
  "name": "ng2-comment-tutorial",
  "version": "1.0.0",
  "description": "",
  "main": "index.js",
  "scripts": {
    "start": "concurrently \"npm run tsc:w\" \"npm run lite\" \"npm run json\"",
    "tsc": "tsc",
    "tsc:w": "tsc -w",
    "lite": "lite-server",
    "typings": "typings",
    "json": "json-server --watch db.json --port 3001",
    "postinstall": "typings install"
  },
  "keywords": [],
  "author": "",
  "license": "ISC",
  "dependencies": {
    "@angular/common": "^2.0.0-rc.3",
    "@angular/compiler": "^2.0.0-rc.3",
    "@angular/core": "^2.0.0-rc.3",
    "@angular/http": "^2.0.0-rc.3",
    "@angular/platform-browser": "^2.0.0-rc.3",
    "@angular/platform-browser-dynamic": "^2.0.0-rc.3",
    "es6-shim": "^0.35.1",
    "marked": "^0.3.5",
    "reflect-metadata": "^0.1.3",
    "rxjs": "^5.0.0-beta.9",
    "symbol-observable": "^1.0.1",
    "systemjs": "^0.19.31",
    "zone.js": "^0.6.12"
  },
  "devDependencies": {
    "concurrently": "^2.1.0",
    "json-server": "^0.8.14",
    "lite-server": "^2.2.0",
    "typescript": "^1.8.10",
    "typings": "^1.3.0"
  }
}

 まとめ

  • 1.xのときよりシンプルになったような印象を受ける
  • 二の足を踏んでいたけど、導入障壁も高くないように感じた
  • ただ、逐一追っているわけではないがまだ破壊的な変更が入っているような話しを耳にする
    • 次に触るのはもう少し安定してからでいいかな、と感じた
    • その際はなにか独立したコンポーネント、例えばreact-resizable-and-movableあたりを移植してみたい
  • Singleton store脳な自分には状態を一元管理するような方法があるとありがたい
    • ng-reduxとか?あまりいい評判は聞かない。。。
  • テスト周りがわからん。rc.4からjasmineに限らずmochaも使用できるようになった?

flowtypeを試してみる

最初に

この記事はflowtype導入の手順紹介というより、自分の作業ログに近いものです。flowtypeって何?ってところも含めて以下に紹介する記事を見たほうがわかりやすいと思いますので、参照してください。

今回試すにあたって、参考にした記事。

qiita.com

qiita.com

joe-re.hatenablog.com

qiita.com

動機

自分の観測範囲内で「flowtypeいいよ!」って話しをよく聴くようになり、試してみることにした。 自分の場合はだが、主な動機としてはReactのpropTypes頑張って書く割に得られる恩恵少ないというのがあってflowtypeであれば、それを改善しつつ、部分的に適用することができる。

新規プロジェクトで あればTypescriptを採用するなどの選択肢を取ることが可能であるが、既存プロジェクトの場合はそうはいかない。だけど、flowtypeであれば既存のプロジェクトにも型の恩恵を付加することができる。

また上でも紹介している以下の記事内にFLOW SOUNDNESS, NO RUNTIME EXCEPTIONS AS GOALとあって、これは導入しない手はないんじゃないか?と思い今に至る。実行時例外のない世界に住んでみたい。

joe-re.hatenablog.com

作業ログ

導入

以下で入る。

npm i -D flow-bin babel-plugin-transform-flow-strip-types

現状のバージョンがflow-bin@0.27.0babel-plugin-transform-flow-strip-types@6.8.0flow-binが本体で、babel-plugin-transform-flow-strip-typesがトランスパイル時にflow type annotationを除去してくれるもの。

package.jsonにflowを追加する。

  • package.json
"scripts": {
  "test": "echo \"Error: no test specified\" && exit 1",
  "flow": "flow",
  "watch": "watchify --extension=js -o public/dist/bundle.js public/src/index.js",
  "start": "node server.js & npm run watch"
},

.babelrcにtransform pluginを追加する。

  • .babelrc
{
  "presets": ["react", "es2015", "stage-1"],
  "plugins": ["babel-plugin-transform-flow-strip-types"]
}

.flowconfigを用意する

今後必要な設定は.flowconfigに追記していく。 ひとまずは以下のような感じ。node_modules以下対象外としておく。

  • .flowconfig
[ignore]
.*/node_modules/.*

[include]

[libs]

[options]

ひとまずの導入はこんなところ。早速動作させてみる。

動作テスト

公式の例となっている以下のようなファイルを用意。

  • test.js
// @flow
function foo(x) {
  return x * 10;
}
foo('Hello, world!');

チェックをかけてみる

$ npm run flow

test.js:5
  5: foo('Hello, world!');
     ^^^^^^^^^^^^^^^^^^^^ function call
  3:   return x * 10;
              ^ string. This type is incompatible with
  3:   return x * 10;
              ^^^^^^ number

Found 1 error

良さそう。

サンプルへの適用

以前Reactのチュートリアル(コメントボックス)にReduxを使ったサンプルを作ってみたことがあるんだけど、そのプロジェクトに対し部分的にflowtypeの適用を試みてみる。その成果物となるものは以下。

github.com

コメント送信部への適用

まずはコメント送信部、public/src/components/comment-form.jsへの適用を試みてみる。

Comment型を定義する。この定義は他のコンポーネントなどでも使用するので別ファイルに定義し、importするものとする。

  • public/src/types.js
/* @flow */

export type Comment = {
  author: string;
  text: string;
};

以下のように使用する。

  • public/src/components/comment-form.js
/* @flow */

import React, { Component, PropTypes } from 'react';
import type { Comment } from '../types';

... 省略 ...
  handleSubmit(e) {
    e.preventDefault();
    const author = this.author.value.trim();
    const text = this.text.value.trim();
    if (!text || !author) return;
    const comment: Comment = { author, text };
    this.props.onCommentSubmit(comment);
    this.author.value = '';
    this.text.value = '';
  }

この時点でチェックをかけると(当然)めちゃめちゃに怒られる。足りない情報を埋めていき、ひとまず以下のような形になった。その際以下のものをよく参照した。(その他まとまっているものなどあれば教えていただけるとうれしいです。)

Flow type cheat sheet - SaltyCrane Blog

github.com

/* @flow */

import React, { Component, PropTypes } from 'react';
import type { Comment } from '../types';

export default class CommentForm extends Component {
  author: HTMLInputElement;
  text: HTMLInputElement;

  handleSubmit(e: Event) {
    e.preventDefault();
    const author = this.author.value.trim();
    const text = this.text.value.trim();
    if (!text || !author) return;
    const comment: Comment = { author, text };
    this.props.onCommentSubmit(comment);
    this.author.value = '';
    this.text.value = '';
  }

  render() {
    return (
      <form className="commentForm" onSubmit={this.handleSubmit.bind(this)}>
        <input type="text" placeholder="Your name" ref={c => {this.author = c;}} />
        <input type="text" placeholder="Say something..." ref={c => {this.text = c;}} />
        <input type="submit" value="Post" />
      </form>
    );
  }
}

例えば以下のように変更すると怒ってくれる。

const comment: Comment = { author, 10 };
public/src/components/comment-form.js:15
 15:     const comment: Comment = { author, 10 };
                        ^^^^^^^ property `text`. Property not found in
 15:     const comment: Comment = { author, 10 };
                                  ^^^^^^^^^^^^^^ object literal

public/src/components/comment-form.js:15
 15:     const comment: Comment = { author, 10 };
                                            ^^ non-string literal property keys not supported


Found 2 errors

良さそう。

propTypesへの適用

メインの動機でもあるpropTypesのチェックを行ってみる。 この辺りから導入してやると、費用対効果が高そうな印象を受ける。

propTypesの定義をstatic propTypes = { ... }のように記述していると、early stage feature proposalということでオプションの設定を促される。当たり前だが、これらはbabelではなくflowtype側で解決する必要がある。具体的には、.flowconfigの[options]に以下を追記してやる。

[options]
esproposal.class_static_fields=enable

comment-formは以下のように変更した。具体的にはpropsで渡されるonCommentSubmitが 関数であることを教えている。

  • public/src/components/comment-form.js
type Props = {
  onCommentSubmit: Function,
}

export default class CommentForm extends Component {
  static propTypes = {
    onCommentSubmit: PropTypes.func.isRequired,
  };

  props: Props;
  author: HTMLInputElement;
  text: HTMLInputElement;
  ...

comment-formを使う側のコンポーネントも/* @flow */を追記しチェックの対象とする。 試しにFunctionではなくNumberを渡してみる。

  • public/src/comment-box.js
  render() {
    const { comments, saveComment } = this.props;
    return (
      <div className="commentBox">
        <h1>Comments</h1>
        <CommentList comments={comments} />
        <CommentForm onCommentSubmit={1} />

チェックをかける。

public/src/components/comment-box.js:20
 20:         <CommentForm onCommentSubmit={1} />
             ^^^^^^^^^^^^^^^^^^^^^^^^^^^^^^^^^^^ React element `CommentForm`
 20:         <CommentForm onCommentSubmit={1} />
                                           ^ number. This type is incompatible with
  7:   onCommentSubmit: Function,
                        ^^^^^^^^ function type. See: public/src/components/comment-form.js:7


Found 1 error

良さそう。ここまで書くと逆にpropTypesを書くメリットはなくなるのだろうか?propTypesを拾ってくれるstyleguideのために書くくらいだろうか?

Reduxへの適用

次にRedux側にも適用してみる。外部ライブラリの型定義はflow-typedで管理するっぽい。

qiita.com

flow-typedのインストール

自分は基本的にはローカルに入れたいんだけど、今回ローカルにいれると面倒そうなのでグローバルにいれることにした。

npm install -g flow-typed
Reduxの型定義の検索、入手

flow-typed search PACAGE_NAMEで検索をできるよう。 flow-typed search Reduxとすると以下のような結果がえられる。

$ flow-typed search redux
 * flow-typed cache not found, fetching from GitHub...done.

Found definitions:
╔═══════════════╤═════════════════╤══════════════╗
║ Name          │ Package Version │ Flow Version ║
╟───────────────┼─────────────────┼──────────────╢
║ redux-actions │ v0.9.x          │ >=v0.23.x    ║
╟───────────────┼─────────────────┼──────────────╢
║ redux         │ v3.x.x          │ >=v0.23.x    ║
╟───────────────┼─────────────────┼──────────────╢
║ redux-form    │ v5.x.x          │ >=v0.22.1    ║
╚═══════════════╧═════════════════╧══════════════╝

す、すくない。redux-xxxxというパッケージの型定義ファイルが2つしか登録されていないことになる。インストールは以下のようにする。

$ flow-typed install -f v0.27.0 redux@3.0.0

これでproject配下のflow-typed/npm/に型情報が格納されると思う。

Storeの型を定義する

インストールした定義は以下のように使用できる。以下はconfigureStoreの返り値の型がStoreであることを定義している。 当然、このままチェックをかけると怒られる。具体的にはredux-thunkredux-loggerが何なのだ?という話しになる。

/* @flow */

import type { Store, Middleware } from 'redux';
import { createStore, applyMiddleware } from 'redux';
import comment from '../reducers/comment';
import thunk from 'redux-thunk';
import createLogger from 'redux-logger';

export default function configureStore(): Store {
  const logger = createLogger();
  const createStoreWithMiddleware = applyMiddleware(
    thunk, logger
  )(createStore);
  const store: Store = createStoreWithMiddleware(comment);
  return store;
}

そのような場合は .flowconfig[libs] でmodule を定義することで import 時に解決するオブジェクトの型定義を解決してくれるらしい。 具体的には以下のように記述している。

  • .flowconfig
[ignore]
.*/node_modules/.*

[include]

[libs]
decls

[options]
esproposal.class_static_fields=enable

[libs]にdeclsディレクトリを指定しておき、decls/modules.jsに以下のようにredux-thunkredux-loggerの型を定義した。

  • decls/modules.js
declare module 'redux-thunk' {
  declare var exports: Function;
}

declare module 'redux-logger' {
  declare var exports: (options?: Object) => Function;
}

この辺りも正直合っているのかわからないところもあるのだけど、declare var exports: string;にしたら怒ってくれるので機能しているようには見える。

Action / Reducerへの適用

あとはこつこつ情報を埋めていくことになる。 actionとreducerに適用してみたものは以下のようになる。 Typescriptflowもこれまで触ったことがなく、間違っている可能性もあるのでその場合はご指摘ください。

  • public/src/actions/comment.js
/* @flow */

import * as api from '../api/api';
import type { Comment } from '../types';
import type { Dispatch } from 'redux';

export const SUBMIT_COMMENT = 'SUBMIT_COMMENT';
export const RECIEVE_COMMENTS = 'RECIEVE_COMMENTS';

export type CommentActionType =
  { type: 'SUBMIT_COMMENT', comment: Comment } |
  { type: 'RECIEVE_COMMENTS', comments: Array<Comment> };


export function submitComment(comment: Comment): CommentActionType {
  return {
    type: SUBMIT_COMMENT,
    comment,
  };
}

export function recieveComments(comments: Array<Comment>): CommentActionType {
  return {
    type: RECIEVE_COMMENTS,
    comments,
  };
}

export function fetchComments() {
  return (dispatch: Dispatch) => {
    api.fetchComments('/api/comments')
      .then((comments) => {
        dispatch(recieveComments(comments));
      }).catch(error => {
        console.error(error);
      });
  };
}

export function saveComment(comment: Comment) {
  return (dispatch: Dispatch) => {
    dispatch(submitComment(comment));
    api.saveComment('/api/comments', comment)
      .then(() => {
        console.log('save comment');
      }).catch(error => {
        console.error(error);
      });
  };
}
  • public/src/reducers/comments.js
/* @flow */

import * as commentActions from '../actions/comment';
import type { CommentActionType } from '../actions/comment';
import type { Comment } from '../types';

export type CommentsState = {
  comments: Array<Comment>,
}

export default function comment(state: CommentsState = { comments: [] }, action: CommentActionType) {
  switch (action.type) {
    case commentActions.SUBMIT_COMMENT:
      return { comments: state.comments.concat([action.comment]) };
    case commentActions.RECIEVE_COMMENTS:
      return { comments: action.comments };
    default:
      return state;
  }
}

まとめ

  • 導入の障壁などなく、既存のプロジェクトにも部分的に適用することが可能なので試しやすい
    • 基本的には入れて損することはないとい印象
  • 基本的には自分が携わっている範囲では導入に対するデメリットは無いように感じる
    • 参照記事にもあるようにデメリットではなく欠点/問題点という表現が良さそうなのだが、flow-typedに対応ライブラリが少ないというのがあげられると思う。
      • ただ、面倒であればひとまず握りつぶしてしまうことも可能だし、これからどんどん増えていく可能性もあるので導入の障壁とは感じていない

ちなみに、検索エンジンの検索数で「このライブラリが人気」みたいなのは自分は好きじゃないんだけど、flowtypeをgoogle trendで調べたところ注目度は上がっているんだとは思う。

f:id:bokuweb:20160619224133p:plain

ElixirですごいE本 11章

すごいErlangゆかいに学ぼう!

すごいErlangゆかいに学ぼう!

引き続き。

11.1 状態を述べろ

defmodule Kitchen do
  def fridge1 do
    receive do
      {{:store, food}, from} ->
        send from, {self(), :ok}
        fridge1
      {{:take, food}, from} ->
        send from, {self(), :not_found}
      :terminate -> :ok
    end
  end
end

実行する

ex(2)> c("ch11.ex")
ch11.ex:1: warning: redefining module Kitchen
ch11.ex:4: warning: variable food is unused
ch11.ex:7: warning: variable food is unused
ch11.ex:15: warning: variable food is unused
ch11.ex:18: warning: variable food is unused
[Kitchen]
iex(3)> fridge1 = spawn(Kitchen, :fridge1, [])
#PID<0.66.0>
iex(4)> send fridge1, {{:store, :apple}, self()}
{{:store, :apple}, #PID<0.57.0>}
iex(5)> flush
{#PID<0.66.0>, :ok}
:ok
iex(6)> send fridge1, {{:take, :apple}, self()}
{{:take, :apple}, #PID<0.57.0>}
iex(7)> flush
{#PID<0.66.0>, :not_found}
:ok
  • 食べ物を保存する場所がない
  • 状態を追加する必要がある
defmodule Kitchen do
  def fridge2(foodList) do
    receive do
      {{:store, food}, from} ->
        send from, {self(), :ok}
        fridge2 [food|foodList]
      {{:take, food}, from} ->
        case Enum.member? foodList, food do
          true ->
            send from, {self(), {:ok, food}}
            fridge2 List.delete foodList, food
          false ->
            send from, {self(), :not_found}
            fridge2 foodList
        end
      :terminate -> :ok
    end
  end
end
  • 状態を再帰で関数のパラメータに保持
iex(10)> c("ch11.ex")
ch11.ex:1: warning: redefining module Kitchen
ch11.ex:4: warning: variable food is unused
ch11.ex:7: warning: variable food is unused
[Kitchen]
iex(11)> pid = spawn(Kitchen, :fridge2, [[:baking_soda]])
#PID<0.80.0>
iex(12)> send pid, {{:store, :milk}, self()}
{{:store, :milk}, #PID<0.57.0>}
iex(13)> flush
{#PID<0.80.0>, :ok}
:ok
iex(14)> send pid, {{:store, :bacon}, self()}
{{:store, :bacon}, #PID<0.57.0>}
iex(15)> send pid, {{:take, :bacon}, self()}
{{:take, :bacon}, #PID<0.57.0>}
iex(16)> send pid, {{:take, :turkey}, self()}
{{:take, :turkey}, #PID<0.57.0>}
iex(17)> flush
{#PID<0.80.0>, :ok}
{#PID<0.80.0>, {:ok, :bacon}}
{#PID<0.80.0>, :not_found}
:ok

11.2 メッセージ大好きだけど秘密にしておいて

defmodule Kitchen do
  def store(pid, food) do
    send pid, {{:store, food}, self()}
    receive do
      {pid, msg} -> msg
    end
  end

  def take(pid, food) do
    send pid, {{:take, food}, self()}
    receive do
      {pid, msg} -> msg
    end
  end

  def fridge2(foodList) do
    receive do
      {{:store, food}, from} ->
        send from, {self(), :ok}
        fridge2 [food|foodList]
      {{:take, food}, from} ->
        case Enum.member? foodList, food do
          true ->
            send from, {self(), {:ok, food}}
            fridge2 List.delete foodList, food
          false ->
            send from, {self(), :not_found}
            fridge2 foodList
        end
      :terminate -> :ok
    end
  end
end
  • メッセージの抽象化を行う
iex(18)> c("ch11.ex")
ch11.ex:1: warning: redefining module Kitchen
ch11.ex:5: warning: variable pid is unused
ch11.ex:12: warning: variable pid is unused
ch11.ex:18: warning: variable food is unused
ch11.ex:21: warning: variable food is unused
[Kitchen]
iex(19)> pid = spawn(Kitchen, :fridge2, [[:baking_soda]])
#PID<0.94.0>
iex(20)> Kitchen.store pid, :water
:ok
iex(21)> Kitchen.take pid, :water
{:ok, :water}
iex(22)> Kitchen.take pid, :juice
:not_found
  • startを追加
defmodule Kitchen do
  def start(foodList) do
    IO.inspect __MODULE__ 
    spawn(__MODULE__ , :fridge2, [foodList])
  end
  
  ...
  
iex(1)> c("ch11.ex")
ch11.ex:1: warning: redefining module Kitchen
ch11.ex:10: warning: variable pid is unused
ch11.ex:17: warning: variable pid is unused
ch11.ex:23: warning: variable food is unused
ch11.ex:26: warning: variable food is unused
[Kitchen]
iex(2)> pid = Kitchen.start [:rhubarb, :dog, :hotdog]
Kitchen
#PID<0.65.0>
iex(3)> Kitchen.take pid, :dog
{:ok, :dog}
  • Elixirではmodule名は__MODULE__で取れる

11.3 タイムアウト

前回やってので省略。 afterでタイムアウト指定できる。

11.4 選択的受信

defmodule MultiProc do
  def important do
    receive do
      {priority, msg} when priority > 10 ->
        [msg | important()]
    after 0 ->
        normal()
    end
  end

  def normal do
    receive do
      {_, msg} ->
        [msg | normal()]
    after 0 ->
        []
    end
  end
end
iex(1)> c("ch11.ex")
ch11.ex:1: warning: redefining module Kitchen
ch11.ex:10: warning: variable pid is unused
ch11.ex:17: warning: variable pid is unused
ch11.ex:23: warning: variable food is unused
ch11.ex:26: warning: variable food is unused
[MultiProc, Kitchen]
iex(2)> send self(), {15, :high}
{15, :high}
iex(3)> MultiProc.important
[:high]
iex(4)> send self(), {15, :high}
{15, :high}
iex(5)> send self(), {17, :high}
{17, :high}
iex(6)> send self(), {9, :low}
{9, :low}
iex(7)> send self(), {5, :low}
{5, :low}
iex(8)> MultiProc.important
[:high, :high, :low, :low]

選択的受信の落とし穴

  • 無視したメッセージが多くなると読み込み時間が長くなる
    • プロセスサイズも大きくなる

HerokuへDockerを使ってPhoenixアプリをデプロイする

ここ数日全然うまくいかなかったけど、一応動作したので記録として残しておく

前提

herokuへのDeploy方法は公式にもアナウンスされていたり、各所で記事が上がっているんだけどいずれも自分の場合うまく行かなかった。カットアンドトライで今の方法に行き着いたので、とんちんかんなことをしている可能性がある。その場合ご指摘いただけると幸いです。

www.phoenixframework.org

条件

  • Elixir / Phoenix インストール済
  • Heroku登録、Toolbeltインストール済
  • Docker Toolboxインストール済

手順

基本的には以下に沿う。brunchを使用するなら以下に沿えば一応動く。

github.com

プロジェクトの作成

$ mix phoenix.new phoenix_heroku_sample

dockerプラグインのインストール

$ heroku plugins:install heroku-docker
$ cd phoenix_heroku_sample

heroku-dockerについては以下を見ると良さそう。

devcenter.heroku.com

app.jsonProcfileの準備

https://github.com/selvan/docker-heroku-phoenix-app からapp.jsonとProcfileをアプリケーションのルートにもってきて、適宜名前など編集する

  • app.json
{
  "name": "phoenix_heroku_sample",
  "description": "A sample phoenix app",
  "image": "joshwlewis/docker-heroku-phoenix:latest",
  "addons": [
    "heroku-postgresql"
  ]
}
  • Procfile
web: MIX_ENV=prod NODE_ENV=production BRUNCH_ENV=production mix phoenix.server

初期化

Dockerfile

Dockerfileが生成される

heroku docker:init

Dockerfileを以下のように変更。 npm run build でビルドするようにしている。

FROM joshwlewis/docker-heroku-phoenix:latest

ENV MIX_ENV prod

# This causes brunch to build minified and hashed assets
ENV BRUNCH_ENV production

# We add manifests first, to cache deps on successive rebuilds
COPY ["mix.exs", "mix.lock", "/app/user/"]
RUN mix deps.get

# Again, we're caching node_modules if you don't change package.json
ADD package.json /app/user/
RUN npm install

# Add the rest of your app, and compile for production
ADD . /app/user/
RUN mix compile \
    && npm run build \
    && mix phoenix.digest

pacakge.json

{
  "repository": {},
  "scripts": {
    "build-assets": "cp -r web/static/assets/* priv/static",
    "watch-assets": "watch-run -p 'web/static/assets/*' npm run build-assets",
    "build-js": "browserify -t babelify web/static/js/app.js | uglifyjs -mc > priv/static/js/app.js",
    "watch-js": "watchify -t babelify web/static/js/app.js -o priv/static/js/app.js -dv",
    "build-css": "cat web/static/css/*.css > priv/static/css/app.css",
    "watch-css": "catw web/static/css/*.css -o priv/static/css/app.css -v",
    "build": "npm run build-assets && npm run build-js && npm run build-css",
    "watch": "npm run watch-assets & npm run watch-js & npm run watch-css",
    "test": "echo \"Error: no test specified\" && exit 1"
  },
  "dependencies": {
    "phoenix": "file:deps/phoenix",
    "phoenix_html": "file:deps/phoenix_html"
  },
  "devDependencies": {
    "babel-preset-es2015": "^6.6.0",
    "babel-preset-react": "^6.5.0",
    "babel-preset-stage-0": "^6.5.0",
    "babelify": "^7.2.0",
    "browserify": "^13.0.0",
    "catw": "^1.0.1",
    "uglify-js": "^2.6.2",
    "watch-run": "^1.2.4",
    "watchify": "^3.7.0"
  }
}

.babelrc

プラグイン、プリセットはおこのみで。

{
  "presets": [
    "es2015",
    "react",
    "stage-0"
  ]
}

app.js

web/static/js/app.jsを編集する

  • web/static/js/app.js
import "../../../deps/phoenix_html/web/static/js/phoenix_html";

assets用ディレクトリ

priv/static/jspriv/static/cssを作成しておく

アプリの作成

heroku create phoenix-heroku-sample

prod.secretの編集

  • config/prod.secret.ex
use Mix.Config

# In this file, we keep production configuration that
# you likely want to automate and keep it away from
# your version control system.
config :phoenix_heroku_sample, PhoenixHerokuSample.Endpoint,
  secret_key_base: System.get_env("SECRET_KEY_BASE")

# Configure your database
config :phoenix_heroku_sample, PhoenixHerokuSample.Repo,
  adapter: Ecto.Adapters.Postgres,
  url: {:system, "DATABASE_URL"},
  pool_size: 20

secret key baseを環境変数に移しておく。 以下のようにconfig/prod.secret.exに記載してあった、secret key baseをセットする

heroku config:set SECRET_KEY_BASE="xxxxxxxxxxxxxxxxxxxxxxxxx" --app phoenix-heroku-sample

prod.secretをgitで管理する。 Heroku · Phoenixではprod.secretを使用せずprodを使用する方法が書かれている。

  • .gitignore
# /config/prod.secret.exs

デプロイ

phoenix_heroku_sample heroku docker:release --app phoenix-heroku-sample

問題

  • ローカルで動か無い気がする
    • docker-compose upじゃだめ?
  • フロント以外の各手順の意味が明確に理解できていない

Phoenix + ReactでChannelを使用した簡易チャットを作る(1)

勉強用の題材としてブログを作りはじめた。

blog.bokuweb.me

ブログの更新やコメントにも使用できるので、次はchannelを使用して簡単なチャットを作ってみる。Channelとは簡単にwebsocket通信ができる機能で、Node.jsにおけるSocket.io的なものと理解している。

動作環境

  • Erlang 17.5
  • Elixir 1.2.0
  • Phoenix 1.1.4
  • node.js 4.2.1

環境構築

前回同様。

blog.bokuweb.me

プロジェクト名はphoenix_channel_sandboxとする。

mix phoenix.new phoenix_channel_sandbox

また今回、package.jsonのdependenciesを削除する際以下の2つは削除しない。

  "dependencies": {
   "phoenix": "file:deps/phoenix",
   "phoenix_html": "file:deps/phoenix_html"
  },

Channelへのjoinまでを実装

バックエンド

lib/phoenix_channel_sandbox/endpoint.exsocket用のエンドポイントが用意されている。

  • lib/chat_phoenix/endpoint.ex
defmodule PhoenixChannelSandbox.Endpoint do
  use Phoenix.Endpoint, otp_app: :phoenix_channel_sandbox

  socket "/socket", PhoenixChannelSandbox.UserSocket

これにより、エンドポイント/socketにアクセスするとUserSocketモジュール に接続されることになる。 UserSocketweb/channels以下に雛形が生成されており、以下の行のコメントアウトを解除する。

  • web/channels/user_socket.ex
  channel "rooms:*", PhoenixChannelSandbox.RoomChannel

メッセージはPhoenix.Socket.Messageの形式でやりとりされる。上記の"rooms:*"はtopic名で、topic名はtopic:subtopic、またはtopicの形式で指定される。*はワイルドカードなのでトピックroomsに来たすべてのサブトピックをRoomChannelモジュールに送ることになる。

Phoenix.Socket.Message – Phoenix v1.1.4

メッセージの受け先となるモジュールroom_channelweb/channelsに作成する。

  • web/channels/room_channel.ex
defmodule PhoenixChannelSandbox.RoomChannel do
  use PhoenixChannelSandbox.Web, :channel

  def join("rooms:join", message, socket), do: {:ok, socket}
end

join/3channelへの参加を承認/拒否する関数で、{:ok, socket}{:ok, reply, socket}を返すことで、承認されchannelに参加できる。 拒否するには、{:error, reply} を返す。今回はtopic名rooms、subtopic名joinにアクセス接続が合った場合無条件に参加を承認している。

バックエンドはこれでOKで、JS側を実装する。

フロント

  • web/static/js/app.js
import "../../../deps/phoenix_html/web/static/js/phoenix_html";
import Socket from "./socket";
  • web/static/js/socket.js
import {Socket} from "phoenix"

let socket = new Socket("/socket", {params: {token: window.userToken}})
socket.connect()

const channel = socket.channel("rooms:join", {})
channel.join()
  .receive("ok", resp => { console.log("Joined successfully", resp) })
  .receive("error", resp => { console.log("Unable to join", resp) })

export default socket

余談だけど、サンプルのJSには;がついていない。;付けない一派なんだろうか。

joinの確認

$ mix phoenix.server
$ open http://localhost:4000/ 

問題なければ下記のようにjoin成功のメッセージが出力されているはず。

f:id:bokuweb:20160322223048p:plain

Reactを使った簡易チャットの実装

バックエンド

room_channel.exに以下の関数を追加する。

  • web/channels/room_channel.ex
  def handle_in("new:message", message, socket) do
    broadcast! socket, "new:reply", %{msg: message["msg"]}
    {:noreply, socket}
  end

handle_in/3は受信メッセージをハンドルする関数で、今回はnew:messageというイベントを受け取った場合、メッセージ内容をブロードキャスト配信している。

https://hexdocs.pm/phoenix/Phoenix.Channel.html#c:handle_in/3

次にReactでマウントできるようweb/template/layout/app.tml.eexを掃除しておく。

  • web/template/layout/app.tml.eex
<!DOCTYPE html>
<html lang="en">
  <head>
    <meta charset="utf-8">
    <meta http-equiv="X-UA-Compatible" content="IE=edge">
    <meta name="viewport" content="width=device-width, initial-scale=1">
    <meta name="description" content="">
    <meta name="author" content="">

    <title>Hello PhoenixChannelSandbox!</title>
    <link rel="stylesheet" href="<%= static_path(@conn, "/css/app.css") %>">
  </head>

  <body>
      <div id="root"></div>
      <script src="<%= static_path(@conn, "/js/app.js") %>"></script>
  </body>
</html>

フロント

  • Reactのインストール
$ npm i  -S react react-dom

送受信が行えるよう、socket.jsを変更しておく。

  • web/static/js/socket.js
import { Socket } from "phoenix";

export default class SocketTest {
  constructor(endpoint, token) {
    this.socket = new Socket(endpoint, { params: { token }});
    this.socket.connect();
  }

  connect(topic, msg = {}) {
    this.channel = this.socket.channel(topic, msg)
    this.channel.join()
      .receive("ok", resp => console.log("Joined successfully", resp))
      .receive("error", resp =>  console.log("Unable to join", resp));
  }

  send(msg) {
    this.channel.push("new:message", { msg }); // TODO: 
  }

  addListener(key, fn) {
    this.channel.on(key, fn);
  }
}

app.jsではフォームの描画とメッセージ受信時の更新、ボタン押下時のメッセージ送信を行う。 今回はnew:replyというイベントをListenして、コールバックでメッセージ内容をstateに詰めてる。

  • web/static/js/app.js
import "../../../deps/phoenix_html/web/static/js/phoenix_html";
import Socket from "./socket";
import React, { Component } from 'react';
import { render } from 'react-dom';

class Chat extends Component {
  constructor(props) {
    super(props);
    this.state = { messages: [] };
    this.socket = new Socket('/socket');
    this.socket.connect('rooms:join', {});
    this.socket.addListener("new:reply", messages => {
      this.setState({ messages: this.state.messages.concat(messages) });
    })
  }

  handleSubmit(e) {
    e.preventDefault();
    const message = this.refs.message.value.trim();
    if (!message) return;
    this.socket.send(message);
  }

  renderMessages() {
    return this.state.messages.map(message => <p>{message.msg}</p>);
  }

  render() {
    return (
      <div>
        <h1>Chat sample!!</h1>
        <form className="commentForm" onSubmit={this.handleSubmit.bind(this)}>
          <input type="text" ref="message" placeholder="message" />
          <input type="submit" value="Post" />
        </form>
        {this.renderMessages()}
      </div>

    );
  }
}

render(<Chat />, document.querySelector('#root'));

ひとまずこれで最低限のチャットは可能となる。

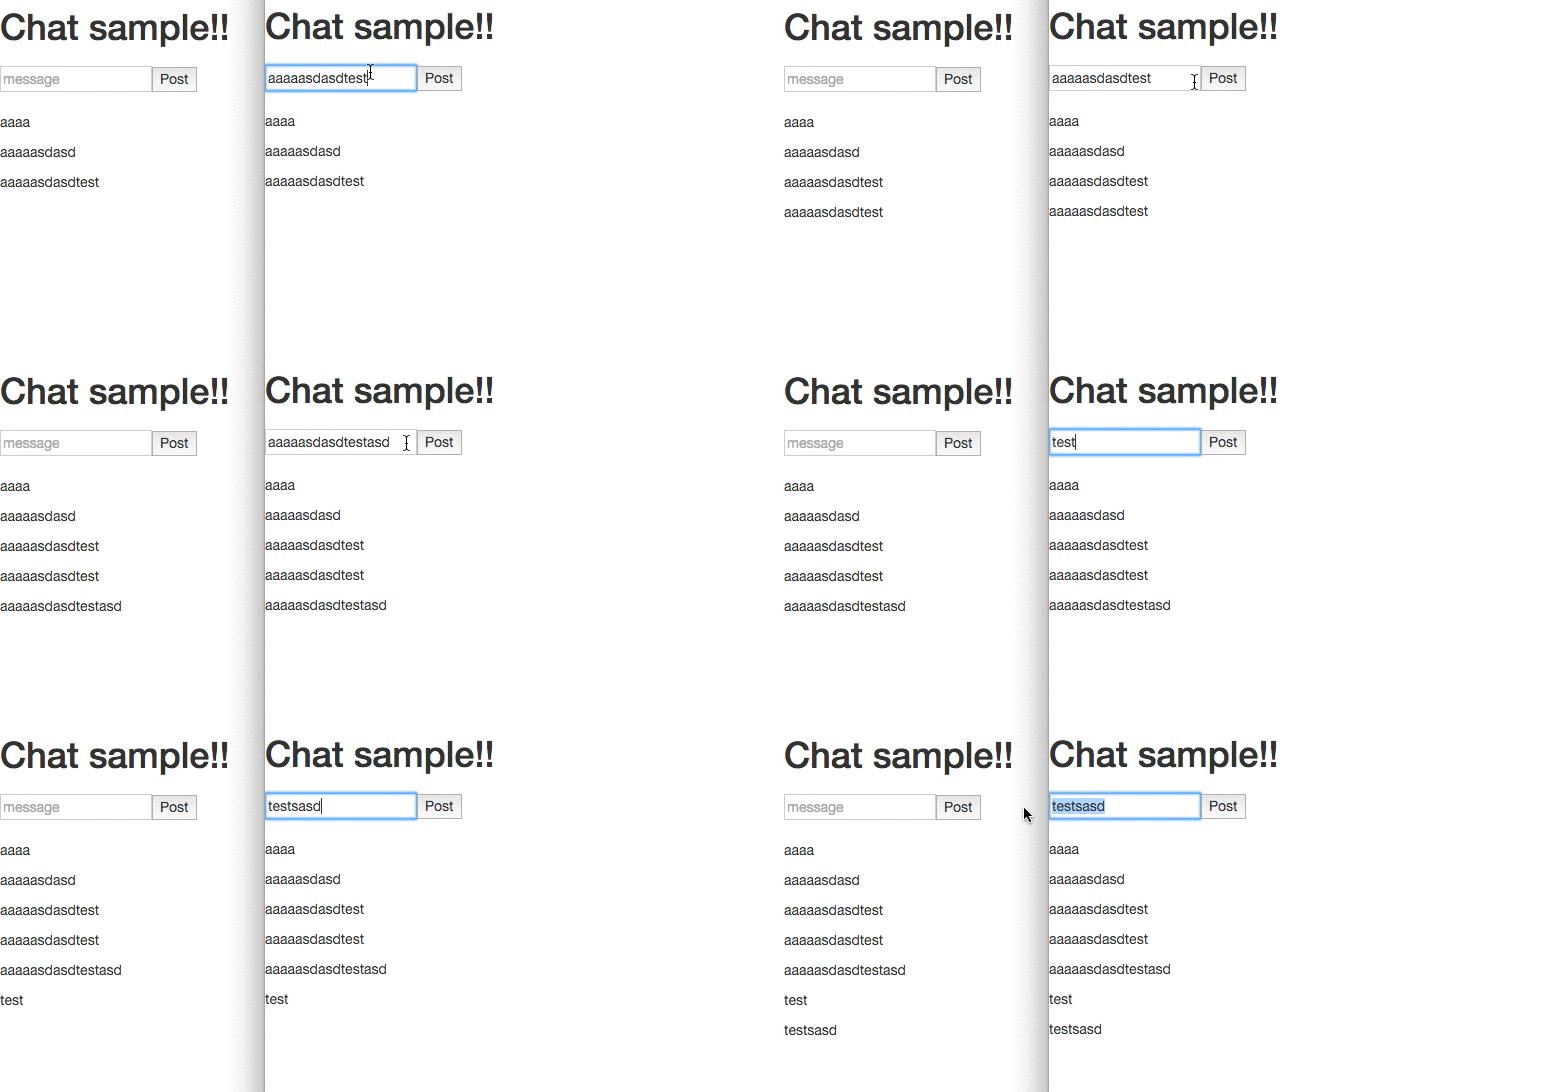
f:id:bokuweb:20160322210259g:plain

今回の成果物

github.com

TODO

  • データの永続化
  • 認証
  • 見た目
  • スクロールとか 検索とか
  • Herokuへのデブロイ
    • かなり検索したがまだ失敗している

参考記事

2015/07/09/Phoenix FrameworkのChannelを使ってTwtter Streamingをbroadcastする - ヽ(´・肉・`)ノログ

ruby-rails.hatenadiary.com

所感

少しElixir書いた

Phoenix + React + Reduxでブログシステムを作る(1)

f:id:bokuweb:20160321192610p:plain

Elixir、Phoenixの勉強のための題材として、ブログシステムで作ってみることにした。飽きるまでのんびり改修していこうと思う。Elixir/Erlangの学習はすごいE本を並行して進める。

Elixir、Phoenixのインストールは完了しているものとする。

今回のゴール

  • 記事の投稿ができる
  • 記事の閲覧ができる

動作環境

  • Erlang 17.5
  • Elixir 1.2.0
  • Phoenix 1.1.4
  • node.js 4.2.1

プロジェクトの作成

プロジェクトを作成する。ただし、自分みたいなフロントな人間は真っ先に--no-brunchを付けたくなると思うんだけど--no-brunchを付けずにあとから手動で変更したほうが楽だという話しを聞くので参考にしてみる。

$ mix phoenix.new phoenix_redux_blog

参考にしたのは以下の記事。

qiita.com

以下、基本的には上記の記事に沿うが、差分としてはbabel-preset-stage-0stylusを入れている点。その他詳細は上記の記事を参照のこと。

  • node_modulesの削除
$ rm -rf node_modules
  • dependenciesの掃除
{
  "repository": {
  },
  "dependencies": {
  }
}
開発用パッケージのインストール
$ npm i -D watchify browserify babelify uglify-js
$ npm i -D babel-preset-es2015 babel-preset-react babel-preset-stage-0 stylus
  • .babelrc
{
  "presets": [
    "es2015",
    "react",
    "stage-0"
  ]
}
  • package.json
{
  "repository": {},
  "scripts": {
    "build-assets": "cp -r web/static/assets/* priv/static",
    "watch-assets": "watch-run -p 'web/static/assets/*' npm run build-assets",
    "build-js": "browserify -t babelify web/static/js/app.js | uglifyjs -mc > priv/static/js/app.js",
    "watch-js": "watchify -t babelify web/static/js/app.js -o priv/static/js/app.js -dv",
    "watch-stylus": "stylus web/static/stylus/ --watch  --out  priv/static/css/",
    "build-stylus": "stylus web/static/stylus/ --out priv/static/css/",
    "build": "npm run build-assets && npm run build-js && npm run build-stylus",
    "watch": "npm run watch-assets & npm run watch-js & npm run watch-stylus",
    "test": "echo \"Error: no test specified\" && exit 1",
    "compile": "npm run build" 
  },
  "dependencies": {
      ...

watchers: [npm: ["run", "watch"]]に変更して、npm scriptでwatchできるようにする。

  • config/dev.exs
config :goal_server, GoalServer.Endpoint,
  http: [port: 4000],
  debug_errors: true,
  code_reloader: true,
  cache_static_lookup: false,
  check_origin: false,
  watchers: [npm: ["run", "watch"]] 

これでJS周りの環境構築は完了

API作成

JSON APIを作成。ひとまず、タイトルの記事本文のみ作成。gen.jsonではなくgen.htmlしてから、JSONを返すようにしたほうが、UIが自動生成されるため便利という情報もあったけど、作業増えそうだったので一旦ペンディング。気になる方は以下を参考にするとよいかも。

qiita.com

以降同じテーマの記事があったのでそちらを参考にさせていただく。

qiita.com

APIを生成する。

$ mix phoenix.gen.json Post posts title:string body:text

指示通り、web/router.exに追記する。

web/router.ex

scope "/api", PhoenixReduxBlog do
  pipe_through :api
  resources "/posts", PostController, except: [:new, :edit]
end
  • PostgreSQLを起動しておく
$ postgres -D /usr/local/var/postgres
  • ecto.createとecto.migrateを実行
$ mix ecto.create 
$ mix ecto.migrate

ここでAPIを確認してみる。以下のように一覧が確認できる。よさそう。

$ mix phoenix.routes

page_path  GET     /               PhoenixReduxBlog.PageController :index
post_path  GET     /api/posts      PhoenixReduxBlog.PostController :index
post_path  GET     /api/posts/:id  PhoenixReduxBlog.PostController :show
post_path  POST    /api/posts      PhoenixReduxBlog.PostController :create
post_path  PATCH   /api/posts/:id  PhoenixReduxBlog.PostController :update
           PUT     /api/posts/:id  PhoenixReduxBlog.PostController :update
post_path  DELETE  /api/posts/:id  PhoenixReduxBlog.PostController :delete

次に参考記事通り、データを追加してみる

$ curl -v -H "Accept: application/json" -H "Content-type: application/json" -X POST -d '{"post": {"title": "phoenixでAPIをつくってみる", "body": "APIのテストだよー" }}' http://localhost:4000/api/posts

取得。

$ curl -v -H "Accept: application/json" -H "Content-type: application/json" http://localhost:4000/api/posts
{"data":[{"title":"phoenixでAPIをつくってみる","id":1,"body":"APIのテストだよー"}]}

ちゃんと返ってきてる。

Reactを使えるようにする

ここでReact周りの準備をしておく。 余分なものを削除。web/templates/layout/app.html.eexを以下のように編集

<!DOCTYPE html>
<html lang="ja">
  <head>
    <meta charset="utf-8">
    <meta http-equiv="X-UA-Compatible" content="IE=edge">
    <meta name="viewport" content="width=device-width, initial-scale=1">
    <meta name="description" content="">
    <meta name="author" content="">

    <title>Hello PhoenixReduxBlog!</title>
    <link rel="stylesheet" href="<%= static_path(@conn, "/css/app.css") %>">
  </head>

  <body>
      <main id="root"></main>
      <script src="<%= static_path(@conn, "/js/app.js") %>"></script>
  </body>
</html>

Reactのインストール

npm i -S react react-dom

web/static/js/app.jsを以下のように編集。 設定が上手くいっていればJSの変更もリアルタイムに反映されるはず。 ひとまず、#root<h1>Hello, World!!</h1>をマウントする。

import "../../../deps/phoenix_html/web/static/js/phoenix_html"
import React from 'react';
import { render } from 'react-dom';

render(<h1>Hello, World!!</h1>, document.querySelector('#root'));

localhost:4000にアクセスして、Hello, World!!が表示されていればOK。

f:id:bokuweb:20160321223810p:plain

よさそう。

Reduxを入れて、最初に登録したデータを表示するところまでやってみる

パッケージの追加

npm i -S redux react-redux redux-api-middleware redux-logger redux-actions

Entry

web/static/js/app.jsを以下のように編集。なお以降のJSファイルは原則web/static/js/配下に配置しているものとする。

  • web/static/js/app.js
import "../../../deps/phoenix_html/web/static/js/phoenix_html";
import React from 'react';
import { render } from 'react-dom';
import { Provider } from 'react-redux';
import configureStore from './stores/configure-store';
import App from './containers/app';

const store = configureStore();

render(
  <Provider store={store}>
    <App />
  </Provider>,
  document.querySelector('#root')
);

Store

middlewareにはapi-middlewareloggerを使用する。 middlewareを適用してストアを生成する。

  • stores/configure-store.js
import { createStore,  applyMiddleware } from 'redux';
import reducers from '../reducers'
import { apiMiddleware } from 'redux-api-middleware';
import createLogger from 'redux-logger';

export default () => {
  const logger = createLogger();
  return createStore(
      reducers,
      applyMiddleware(apiMiddleware, logger)
  );
};

Action

redux-api-middlewareを使用している。 fetchArticlesが呼ばれたら、エンドポイント/api/postsGETし、記事を取得してくる。 成功時には取得記事がpayloadに詰められたActionが生成され、reducerに配送される。

  • actions/blog.js
import { CALL_API } from 'redux-api-middleware';

export const fetchArticles = () => {
  return {
    [CALL_API]: {
      endpoint: '/api/posts',
      method: 'GET',
      types: [
        'REQUEST_FETCH_POSTS',
        {
          type: 'SUCCESS_FETCH_POSTS',
          payload: (action, state, res) => res.json().then(payload => payload),
        },
        'FAILURE_FETCH_POSTS',
      ],
    }
  }
}

Reducer

RootReducer。ひとまずblogにしとく。

  • reducers/index.js
import { combineReducers } from 'redux';
import blog from './blog';

const rootReducer = combineReducers({
  blog,
});

export default rootReducer;

blog rediucer。投稿記事のフェッチ成功時にpostsに内容を突っ込んでおく。

  • reducers/blog.js
import { handleActions } from 'redux-actions';

const defaultState = {
  posts: [],
};

export default handleActions({
  SUCCESS_FETCH_POSTS: (state, action) => {
    return { posts: action.payload.data };
  },
}, defaultState);

Container

  • containers/app.js
import { connect } from 'react-redux';
import { bindActionCreators } from 'redux';
import Blog from '../components/blog';
import * as blog from '../actions/blog';

const mapStateToProps = state => state;

const mapDispatchToProps = dispatch => ({
  actions :{
    blog: bindActionCreators(blog, dispatch),
  }
});

export default connect(
  mapStateToProps,
  mapDispatchToProps
)(Blog);

Components

mount時に記事を取りに行って、先頭記事のタイトルのみ表示している。 記事がない場合はテキストloadingを表示する。

  • components/blog.js
import React, { Component } from 'react';

export default class Blog extends Component {
  constructor(props) {
    super(props);
  }

  componentDidMount() {
    this.props.actions.blog.fetchArticles();
  }

  render() {
    return (
      <h1>
        {
          this.props.blog.posts.length !== 0
            ? this.props.blog.posts[0].title
            : 'loading'
        }
      </h1>
    );
  }
}

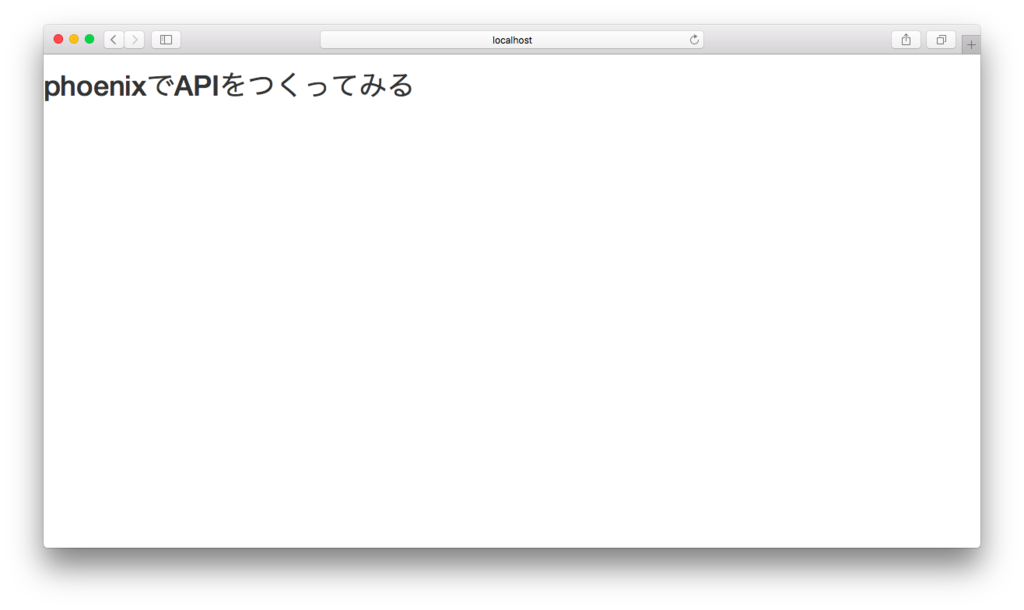
f:id:bokuweb:20160321201830p:plain

表示された。 ここまで実装したら見た目とか、フォーム、actionをゴリゴリ書いてく。 ここまでのコードは以下。

github.com

記事の投稿・閲覧の実装

ここでスタイルの追加やコンポーネントの分割を行っている。

Components

Content

サイドメニューとコンテンツ部分に分割した。サイドメニューには今は何もないので省略。 取得した記事をひたすら表示していく。

import React, { Component, PropTypes } from 'react';
import PostForm from './post-form';

export default class Contents extends Component {
  renderPosts() {
    return this.props.posts.map(post => {
      return (
        <div>
          <h2 className="contents__title">{post.title}</h2>
          <p className="contents__body">{post.body}</p>
        </div>
      );
    })
  }

  render() {
    return (
      <div className="contents">
        <PostForm addPost={this.props.post} />
        {
          this.props.posts.length !== 0
            ? this.renderPosts()
            : 'loading'
        }
      </div>
    );
  }
}
PostForm

postボタンが押下されるとtitle, bodyを引数にアクションaddPostを呼ぶ。

import React, { Component, PropTypes } from 'react';

export default class PostForm extends Component {
  constructor(props) {
    super(props);
    this.state = { title: '', body: '' };
  }

  onTitleChange(e) {
    this.setState({ title: e.target.value });
  }

  onBodyChange(e) {
    this.setState({ body: e.target.value });
  }

  onSubmit(e) {
    e.preventDefault();
    const title = this.state.title.trim();
    const body = this.state.body.trim();
    if (!title || !body) return;
    this.props.addPost({ post: { title, body } });
  }

  render() {
    return (
      <div className="post-form">
        <input
           type="text"
           className="post-form__input"
           onChange={this.onTitleChange.bind(this)}
           placeholder="title"
        />
        <textarea
          className="post-form__textarea"
          onChange={this.onBodyChange.bind(this)}
        />
        <input
          className="post-form__button"
          type="submit"
          onClick={this.onSubmit.bind(this)}
          value="Post"
        />
      </div>
    );
  }
}

Action

Actionに投稿用のものを追加した。

export const addPost = (payload) => {
  return {
    [CALL_API]: {
      headers: { 'Content-Type': 'application/json', 'Accept': 'application/json' },
      endpoint: '/api/posts',
      method: 'POST',
      body: JSON.stringify(payload),
      types: [
        'REQUEST_ADD_POST',
        {
          type: 'SUCCESS_ADD_POST',
          payload: (action, state, res) => res.json().then(payload => payload),
        },
        'FAILURE_ADD_POST',
      ],
    }
  }
}

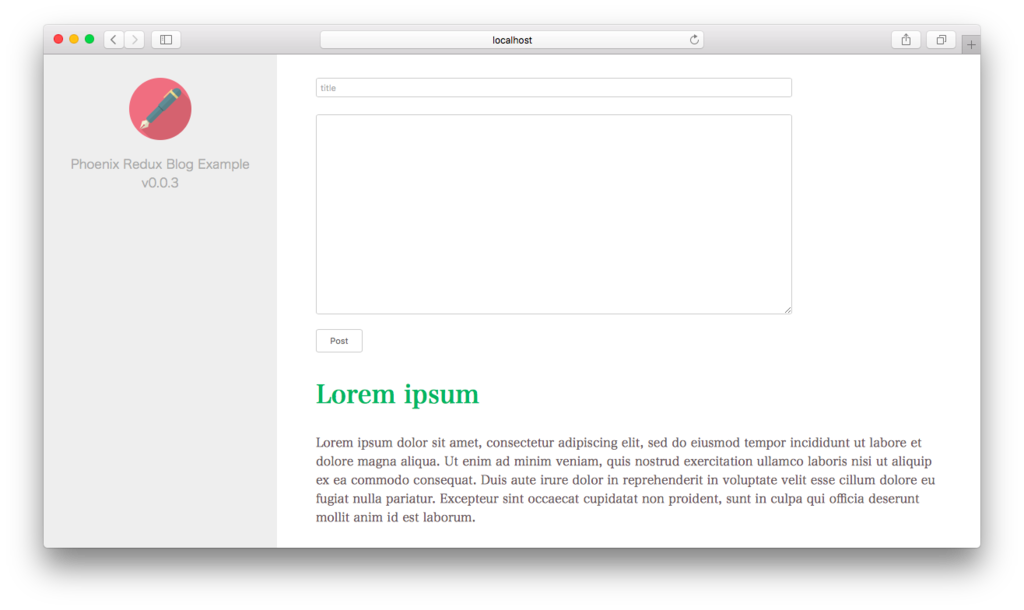
前回のものから大きな差分はこんなところ。 ひとまず記事の投稿・閲覧ができるようになった。

f:id:bokuweb:20160321202929g:plain

その他詳細は以下を参照ください。

github.com

TODO

  • [ ] HerokuへのDeploy
    • 試してみたが、今はなぜかstartに失敗してクラッシュしている.更のプロジェクトで試してみる
  • [ ] 認証、ログイン機能
  • [ ] SSR
  • [ ] Channelによる記事の更新
  • [ ] 記事の編集・削除
  • [ ] インクリメンタル検索
  • [ ] ページング
  • [ ] 管理画面
  • [ ] コメント機能

所感

Elixir全く書いていない

ぽよんと表示されるmodalコンポーネントを作った

f:id:bokuweb:20160318085435g:plain

吹き出しコンポーネントを作った時から、SVGで面白い動きのコンポーネントが作ってみたいと思っていて、その習作としてSVGで描画したぽよんと表示されるmodalコンポーネントを作ってみた。

blog.bokuweb.me

作ったもの

github.com

デモ

React-elastic-modal example

使い方

インストール

npm i react-elastic-modal

サンプル

以下のように使用する。極力react-modalに似せたつもり。

<Modal
  isOpen={ this.state.isOpen }
  onRequestClose={ () => this.setState({ isOpen: false }) }
  modal={{
    width: '50%',
    height: '360px',
    backgroundColor: '#fff',
    opacity: 0.5,
  }}
  overlay={{
    background: 'rgba(0, 0, 0, 0.4)',
  }}
>
  <div>modal example</div>
</Modal>

このコンポーネントについて

使用例

@59nagaさんが以下のサイトで使ってくれている。ありがとうござます。

https://cdn.berabou.me/

SVGまわり

以下のように書いて、rafでアニメーションしてる。なんかあまりいい方法とは思えない。また、親から例えばサイズを100px×100pxでもらった場合、伸縮を表現するためにSVG領域は110px×110px確保している。アニメーション完了後いサイズを戻せばいいんだろうけど、今は放置している。SVGの機能についても、もっと理解を深める必要がありそう。

modalのコンテンツはSVGとは別レイヤーにしてz-indexで被せている。この辺りも正攻法を把握してない。

<svg
  width={`${100 + svgMarginRatio * 200}%`}
  height={`${100 + svgMarginRatio * 200}%`}
  style={{
    position: 'absolute',
    top: `-${100 * svgMarginRatio}%`,
    left: `-${100 * svgMarginRatio}%`,
    transform: `scale3d(${this.state.scale}, ${this.state.scale}, 1)`,
    opacity: this.props.modal.opacity || 1,
  }}
>
  <path d={ `M ${x0} ${y0}
             Q ${cx} ${top} ${x1} ${y0}
             Q ${right} ${cy} ${x1} ${y1}
             Q ${cx} ${bottom} ${x0} ${y1}
             Q ${left} ${cy} ${x0} ${y0}` }
    fill={ this.props.modal.backgroundColor }
  />
</svg>

中央寄せの話し

modalを中央寄せする中で最近は以下の方法がかなりお気に入りで使用していたんだけど、要素のwidth/heightが奇数の場合、transform: translate(-50%, -50%)で座標が小数点になって表示がぼやけるってことに遭遇した。これだったらボックスのサイズを知る必要がなく便利なんだけど、結局古のネガティブマージンで対応することにした。css難しい。

.outer {
  position: relative;
}
.inner {
  position: absolute;
  top: 50%;
  left: 50%;
  transform: translate(-50%, -50%);
}

テストまわり

最近はenzymeを使っているんだけどまだ理解できていないところが多い。基本shallowを使ってテスト(この場合はmockは不要?)して、必要に応じてmountするという方法をとってるんだけどそういうスタンスでいいんだろうか。

たとえば、defaultPropsの値を確認したかったり、componentDidMountを発火させたかったり、element.clientHeightを取りたいような場合はどうしいてもmountする必要がある。その場合は結局mockeryとかproxyquireとかでmockに置き換える必要があると思う(今回は単一のコンポーネントなので必要ないけど)んだけどそうのようなスタンスでいいのか不明だ。

もう一点ハマった点は、modalclinetHeight/Widthが常に0が取れてきていて、なんだろうと思っていたんだけどマウントの仕方が悪かったよう。どうやら以下のようにしているとサイズが出ないようで、

const modal = mount(
  <Modal ..... />
);

正しくは以下のようにdivにアタッチする必要があるよう。

const modal = mount(
  <Modal ..... />, { attachTo: div }
);

そのため、beforeとafterで以下のようにしている。

describe('Modal test', () => {
  let div;
  beforeEach(() => {
    div = document.createElement('div');
    document.body.appendChild(div);
  });

  afterEach(() => {
    document.body.innerHTML = '';
  });

 ...

さいご

SVGは楽しいんだけど、もう少し、SVG自身の機能や作法を学ぶ必要がありそう。またモーフィング周りにいいライブラリがあるともっと楽しめそうなんだが、sebmarkbage/artこのあたりとか使えるんだろうか。

ElixirですごいE本 10章

しばらく停止していたElixirの勉強、順番を入れ替えて10章から再開することにした。

すごいErlangゆかいに学ぼう!

すごいErlangゆかいに学ぼう!

10.4 さようなら、いままで魚をありがとう

プロセスを生成する

iex(1)> spawn fn -> 2 + 2 end
#PID<0.59.0>

http://elixir-lang.org/getting-started/processes.html#spawn

  • <0.59.0> はプロセス識別子
  • プロセスを表す任意の値
defmodule LearnProcess do
  def g(x), do: :timer.sleep 10, IO.puts x

  def start do
    Enum.each(Range.new(1, 10), fn(i) ->
      spawn fn -> IO.puts i end
    end)
  end
end

LearnProcess.start

- 結果

6
2
1
4
8
3
9
10
5
7
  • :をつけるとErlangの関数が呼べる
  • なのでio:formatもこんなふうに呼べる:io.format("Hello, world!~n")
iex(1)> self()
#PID<0.57.0>
iex(2)> Process.alive?(self())
true
iex(5)> self()
#PID<0.57.0>
iex(6)> exit(self())
** (exit) #PID<0.57.0> 
  • self()で現在のプロセスのpid
  • alive?で生存を確認
  • pid変わってない..

メッセージを送信する

iex(1)> send self(), {:hello, "world"}
{:hello, "world"}
iex(2)> send self(), "hello"
"hello"
iex(3)> send self(), "hello"
"hello"
iex(4)> flush()
{:hello, "world"}
"hello"
"hello"
:ok
iex(5)> flush()
:ok
  • send/2でメッセージ送信
  • flush/0はメールボックスにある全てのメッセージを表示し,空にする

メッセージを受信する

  • dolphin.ex
defmodule Dolphins do
  def dolphin1 do
    receive do
      :do_a_flip -> IO.puts "How about no?"
      :fish -> IO.puts "So long and thanks for all the fish"
      _ -> IO.puts "Heh, we're smarter than you humans."
    end
  end
end
iex(1)> c("dolphins.ex")
iex(2)> send self(), :fish
:fish
iex(3)> spawn(Dolphins.dolphin1)
So long and thanks for all the fish
** (ArgumentError) argument error
    :erlang.spawn(:ok)
  • 受け取れてるがargument errorでてる

こうか。spawn/3の第二引数はatom

iex(1)> dolphin = spawn(Dolphins, :dolphin1, [])
#PID<0.60.0>
iex(2)> send dolphin, "oh, hello dolphin!"
Heh, we're smarter than you humans.
"oh, hello dolphin!"
iex(3)> send dolphin, :fish
:fish
iex(4)> send dolphin, :fish
:fish
iex(5)> send dolphin, :fish
:fish

プロセス終了していない。

もしパターンにマッチするメッセージがメールボックスに無ければ,現在のプロセスはマッチするメッセージがくるまで待ち続けます.タイムアウトを指定することもできます

defmodule Dolphins do
  def dolphin1 do
    receive do
      :do_a_flip -> IO.puts "How about no?"
      :fish -> IO.puts "So long and thanks for all the fish"
      _ -> IO.puts "Heh, we're smarter than you humans."
    after
      1_000 -> IO.outs "nothing after 1s"
    end
  end
end
iex(11)> c("ch10.ex")
[Dolphins]
iex(12)> dolphin = spawn(Dolphins, :dolphin1, [])
#PID<0.132.0>
nothing after 1s
  • タイマーを付けてみる、1sメッセージがなければ終了
defmodule Dolphins do
  def dolphin1 do
    receive do
      :do_a_flip -> IO.puts "How about no?"
      :fish -> IO.puts "So long and thanks for all the fish"
      _ -> IO.puts "Heh, we're smarter than you humans."
    after
      1_000 -> IO.puts "nothing after 1s"
    end
  end

  def dolphin2 do
    receive do
      {:do_a_flip, from} -> send from, "How about no?"
      {:fish, from} -> send from, "So long and thanks for all the fish"
      _ -> IO.puts "Heh, we're smarter than you humans."
    end
  end
end
iex(1)> c("ch10.ex")
[Dolphins]
iex(2)> dolphin = spawn(Dolphins, :dolphin2, [])
#PID<0.68.0>
iex(3)> send(dolphin, {:do_a_flip, self()})
{:do_a_flip, #PID<0.57.0>}
iex(4)> flush()
"How about no?"
:ok
iex(5)> send(dolphin, {:fish, self()})
{:fish, #PID<0.57.0>}
iex(6)> flush()
:ok
  • タプルにpidを詰めて送信、送り返す
  • 送り返した後プロセス終了?
defmodule Dolphins do
  def dolphin3 do
    receive do
      {:do_a_flip, from} ->
        send(from, "How about no?")
        dolphin3
      {:fish, from} -> send(from, "So long and thanks for all the fish")
      _ ->
        IO.puts "Heh, we're smarter than you humans."
        dolphin3
    end
  end
end
iex(8)> dolphin = spawn(Dolphins, :dolphin3, [])
#PID<0.83.0>
iex(9)> send(dolphin, {:do_a_flip, self()})
{:do_a_flip, #PID<0.57.0>}
iex(10)> send(dolphin, {:do_a_flip, self()})
{:do_a_flip, #PID<0.57.0>}
iex(11)> send(dolphin, {:do_a_fl, self()})
Heh, we're smarter than you humans.
{:do_a_fl, #PID<0.57.0>}
iex(12)> flush()
"How about no?"
"How about no?"
:ok
iex(13)> send(dolphin, {:do_a_fl, self()})
Heh, we're smarter than you humans.
{:do_a_fl, #PID<0.57.0>}
iex(14)> send(dolphin, {:do_a_flip, self()})
{:do_a_flip, #PID<0.57.0>}
iex(15)> flush()
"How about no?"
:ok
iex(16)> send(dolphin, {:fish, self()})
{:fish, #PID<0.57.0>}
iex(17)> send(dolphin, {:do_a_flip, self()})
{:do_a_flip, #PID<0.57.0>}
iex(18)> flush()
"So long and thanks for all the fish"
:ok
iex(19)> flush()
:ok
iex(20)> send(dolphin, {:do_a_flip, self()})
{:do_a_flip, #PID<0.57.0>}
iex(21)> flush()
:ok
  • メッセージを送り返したあと再帰でメッセージ待機